Personal Data Management
Use the SAP Personal Data Manager (PDM) with a CAP application.
To follow this cookbook hands-on you need an enterprise account.
The SAP Personal Data Manager service is currently only available for enterprise accounts. An entitlement in trial accounts is not possible.
SAP BTP provides the SAP Personal Data Manager (PDM) which allows administrators to respond to the question "What data of me do you have?". To answer this question, the PDM service needs to fetch all personal data using an OData endpoint. That endpoint has to be provided by the application as follows.
Annotate Personal Data
First identify entities and elements (potentially) holding personal data using @PersonalData annotations, as explained in detail in the Annotating Personal Data chapter of these guides.
We keep using the Incidents Management reference sample app.
Provide a Service Interface to SAP Personal Data Manager
SAP Personal Data Manager needs to call into your application to read personal data so you have to define a respective service endpoint, complying to the interface required by SAP Personal Data Manager. Following the CAP principles, we recommend adding a new dedicated CAP service that handles all the personal data manager requirements for you. This keeps the rest of your data model clean and enables reuse, just as CAP promotes it.
CAP Service Model for SAP Personal Data Manager
Following the best practice of separation of concerns, we create a dedicated service for the integration with SAP Personal Data Manager:
using {sap.capire.incidents as db} from '../db/schema';

@requires: 'PersonalDataManagerUser' // security check
service PDMService @(path: '/pdm') {

  // Data Privacy annotations on 'Customers' and 'Addresses' are derived from original entity definitions
  entity Customers                as projection on db.Customers;
  entity Addresses                as projection on db.Addresses;
  entity Incidents                as projection on db.Incidents

  // create view on Incidents and Conversations as flat projection
  entity IncidentConversationView as
      select from Incidents {
              ID,
              title,
              urgency,
              status,
          key conversation.ID        as conversation_ID,
              conversation.timestamp as conversation_timestamp,
              conversation.author    as conversation_author,
              conversation.message   as conversation_message,
              customer.ID            as customer_ID,
              customer.email         as customer_email
      };

  // annotate new view
  annotate PDMService.IncidentConversationView with @(PersonalData.EntitySemantics: 'Other') {
      customer_ID @PersonalData.FieldSemantics: 'DataSubjectID';
  };

  // annotations for Personal Data Manager - Search Fields
  annotate Customers with @(Communication.Contact: {
        n    : {
            surname: lastName,
            given  : firstName
        },
        bday : dateOfBirth,
        email: [{
          type   : #preferred,
          address: email}]
    });

  };
TIP
Make sure to have indicated all relevant entities and elements in your domain model.
Provide Flat Projections
As an additional step, you have to create flat projections on the additional business data, like transactional data.
In our model, we have Incidents and Conversations, which are connected via a composition. Since SAP Personal Data Manager needs flattened out structures, we define a helper view IncidentConversationView to flatten this out.
We have to then add data privacy-specific annotations to this new view as well. The IncidentConversationView as transactional data is marked as Other. In addition, it is important to tag the correct field, which defines the corresponding data subject, in our case that is customer_ID @PersonalData.FieldSemantics: 'DataSubjectID';
Annotating Search Fields
In addition, the most important search fields of the data subject have to be annotated with the corresponding annotation @Communication.Contact.
To perform a valid search in the SAP Personal Data Manager application, you will need Surname, Given Name, and Email or the Data Subject ID. Details about this annotation can be found in Communication Vocabulary.
Alternatively to the tuple Surname, Given Name, and Email, you can also use Surname, Given Name, and Birthday (called bday), if available in your data model. Details about this can be found in SAP Personal Data Manager - Developer Guide.
Restrict Access Using the @requires Annotation
To restrict access to this sensitive data, the PDMservice is protected by the @requires: 'PersonalDataManagerUser' annotation. Calling the PDMservice externally without the corresponding permission is forbidden. The Personal Data Manager service calls the PDMservice with the needed role granted. This is configured in the xs-security.json file, which is explained later.
Learn more about security configuration and the SAP Personal Data Manager.
At this point, you are done with your application. Let's set up the SAP Personal Data Manager and try it out.
Connecting SAP Personal Data Manager
Next, we will briefly detail the integration to SAP Personal Data Manager. A more comprehensive guide, incl. tutorials, is currently under development. For further details, see the SAP Personal Data Manager Developer Guide.
Activate Access Checks in xs-security.json
Because we protected the PDMservice, we need to establish the security check properly. In particular, you need the xs-security.json file to make the security check active. The following xs-security.json is from our sample.
{
  "xsappname": "incidents-mgmt",
  "tenant-mode": "shared",
  "scopes": [
    {
      "name": "$XSAPPNAME.PersonalDataManagerUser",
      "description": "Authority for Personal Data Manager",
      "grant-as-authority-to-apps": [
        "$XSSERVICENAME(pdm)"
      ]
    }
  ]
}
Here you define that your personal data manager service instance, called pdm, is allowed to access your CAP application granting the PersonalDataManagerUser role.
Add @sap/xssec Library
To make the authentication work, you have to enable the security strategy by installing the @sap/xssec package:
npm install @sap/xssecLearn more about authorization in CAP using Node.js.
Build and Deploy Your Application
The Personal Data Manager can't connect to your application running locally. Therefore, you first need to deploy your application. In our sample, we added two manifest files using cds add cf-manifest and SAP HANA configuration using cds add hana.
The general deployment is described in detail in Deploy Using Manifest Files.
Make a production build:
cds build --productionDeploy your application:
cf create-service-pushSubscribe to SAP Personal Data Manager Service
Subscribe to the service from the Service Marketplace in the SAP BTP cockpit.

Follow the wizard to create your subscription.
Create Role Collections
SAP Personal Data Manager comes with the following roles:
| Role Name | Role Template |
|---|---|
| PDM_Administrator | PDM_Administrator |
| PDM_CustomerServiceRepresentative | PDM_CustomerServiceRepresentative |
| PDM_OperatorsClerk | PDM_OperatorsClerk |
All of these roles have two different Application Identifiers.
TIP
Application identifiers with !b are needed for the UI, and identifiers with !t are needed for executing the Postman collection.
Learn more about defining a role collection in SAP BTP cockpit
Create a Service Instance
You need a configuration file, like the following, to create a service instance for the Personal Data Manager.
pdm-instance-config.json
{
  "xs-security": {
    "xsappname": "incidents-mgmt",
    "authorities": ["$ACCEPT_GRANTED_AUTHORITIES"]
  },
  "fullyQualifiedApplicationName": "incidents-mgmt",
  "appConsentServiceEnabled": true
}
Create a service instance using the SAP BTP cockpit or execute the following command:
cf create-service personal-data-manager-service standard incidents-mgmt-pdm -c ./pdm-instance-config.jsonBind the Service Instance to Your Application.
With both the application deployed and the SAP Personal Data Manger service set up, you can now bind the service instance of the Personal Data Manager to your application. Use the URL of your application in a configuration file, such as the following example, which you need when binding a service instance.
pdm-binding-config.json
{
  "fullyQualifiedApplicationName": "incidents-mgmt",
  "fullyQualifiedModuleName": "incidents-mgmt-srv",
  "applicationTitle": "PDM Incidents",
  "applicationTitleKey": "PDM Incidents",
  "applicationURL": "https://incidents-mgmt-srv.cfapps.eu10.hana.ondemand.com/", // get the URL from the CF CLI command: cf apps
  "endPoints": [
    {
      "type": "odatav4",
      "serviceName": "pdm-service",
      "serviceTitle": "Incidents Management",
      "serviceTitleKey": "IncidentsManagement",
      "serviceURI": "pdm",
      "hasGdprV4Annotations": true,
      "cacheControl": "no-cache"
    }
  ]
}
Here the applicationURL, the fullyQualifiedModuleName, and the serviceURI have to be those of your Cloud Foundry deployment and your CAP service definition (services-manifest.yaml).
Bind the service instance using the SAP BTP cockpit or execute the following command:
cf bind-service incidents-mgmt-srv incidents-mgmt-pdm -c ./pdm-binding-config.jsonUsing the SAP Personal Data Manager Application
Open the SAP Personal Data Manager application from the Instances and Subscriptions page in the SAP BTP cockpit.

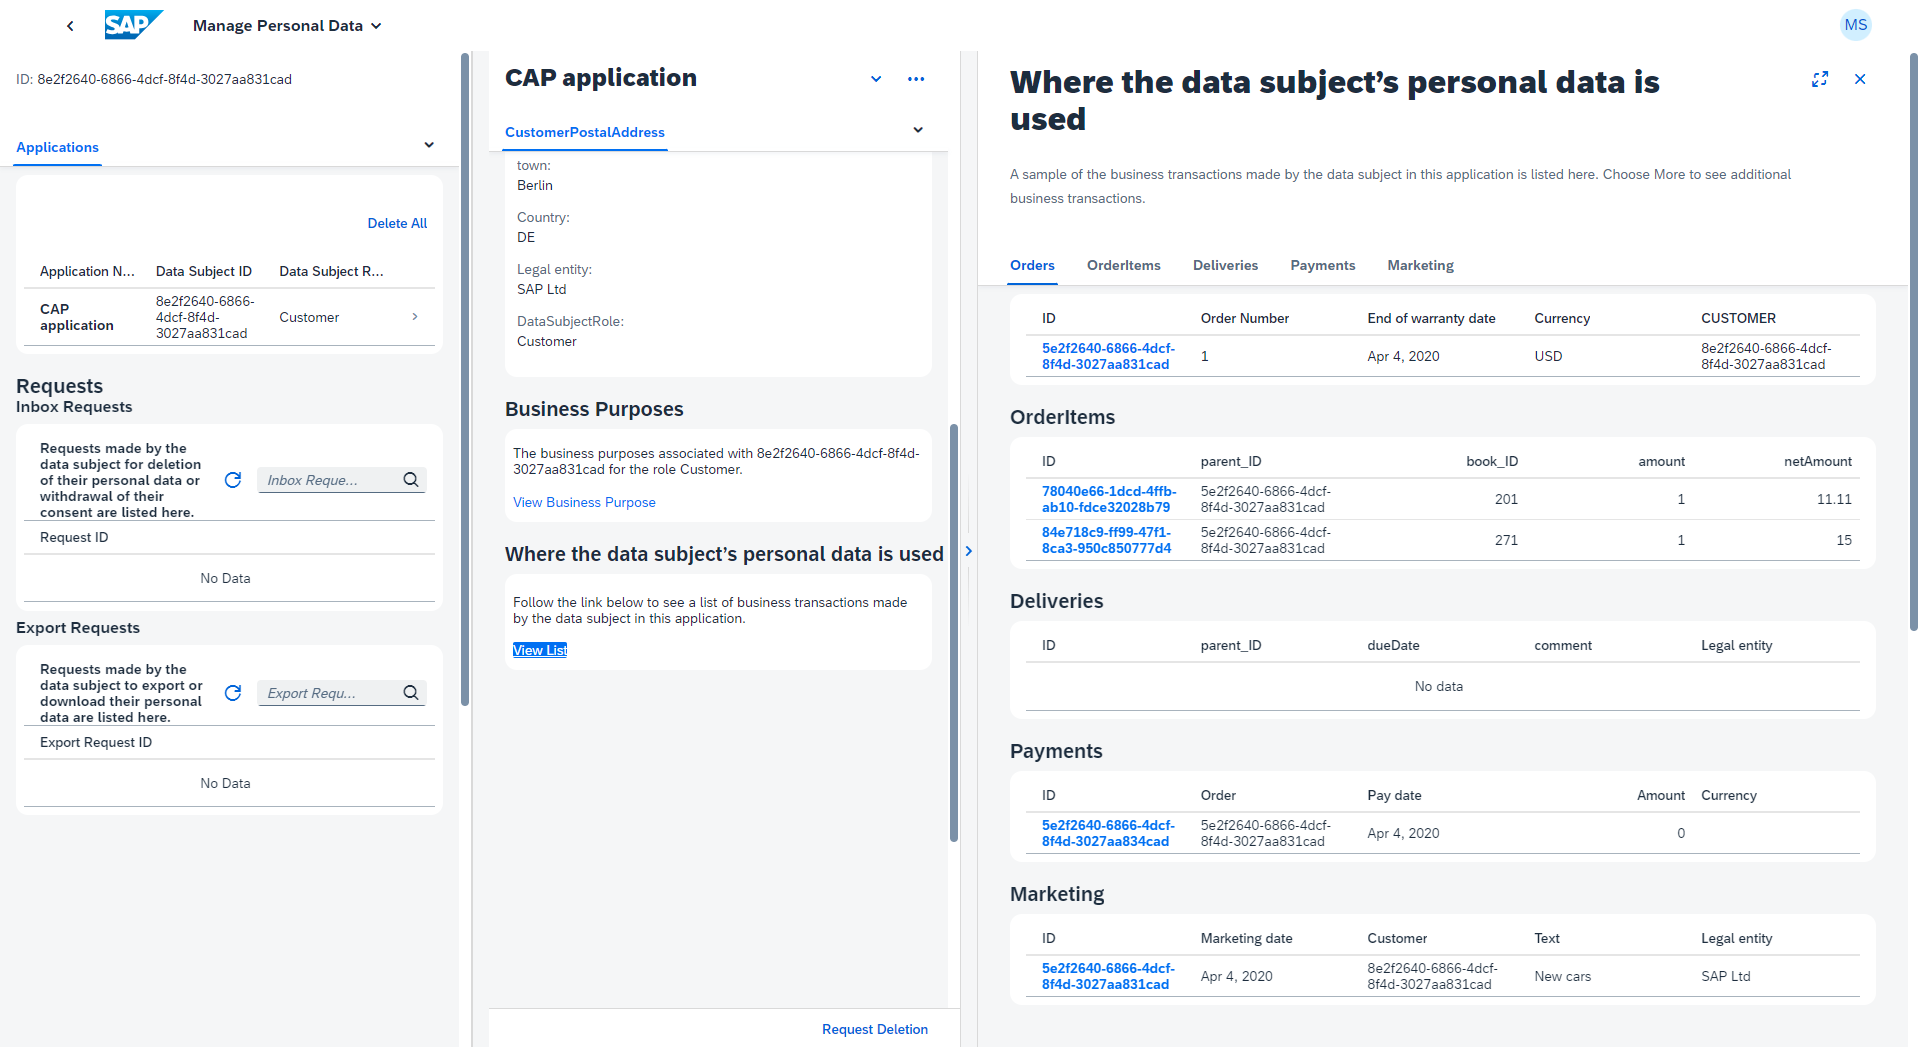
In the personal data manager application you can search for data subjects with First Name, Last Name, and Date of Birth, or alternatively with their ID.
